You might want to install a secure File Transfer Protocol (FTP) server on Windows so that you can either store files independently or have a way to edit your website that is hosted on an Internet Information Services (IIS) web server. In either scenario, you have the option of utilizing an integral part of the IIS known as the FTP Server. It is possible to install it either independently or in conjunction with a Web Server. 1
In this guide to building a secure FTP Server (FTP over SSL), we’ll set up IIS, get an SSL certificate, create a user with permissions, etc.
What exactly is FTPS?
FTPS, which stands for File Transfer Protocol over Secure Sockets Layer, is dependent on SSL (Secure Sockets Layer) to construct a secure channel between the client and the server. SSL relies on certificates as a means of establishing a sender’s identity and providing an additional layer of protection for communications sent across private or public networks (Internet).
FTP does not, by itself, provide any kind of encryption or authentication. Instead, FTP uses SSL (hence FTPS) to build an SSL tunnel. This allows FTP to send all data in clear text through the tunnel. FTPS is an extension of SSL. In layman’s terms, FTPS is simply FTP with the addition of functionality for SSL encryption.
Installing IIS and FTP Server features
You are going to need to activate the FTP Server capability, regardless of whether you are installing IIS or already have it installed. You will need to incorporate the FTP server functionality as an IIS “role service” while configuring the “Web Server Role (IIS)” in your Server Manager. This is done by selecting “Web Server Role (IIS)” from the drop-down menu. The functionality of the FTP server is turned off by default.
- Launch Server Manager, then select “Role-based installation” from the menu.
- Afterward, navigate to the Server Roles menu and open the Web Server (IIS) option.
- Click on FTP Server, then check to see that both “FTP service” and “FTP Extensibility” are checked off. In addition to that, you will need to make sure that the Management Tools package is installed.
- Click “Next” to confirm your installation, then follow the on-screen instructions to install the software and wait for it to finish.
- Check to see that the FTP Server and Management Tools have been properly installed.
How do you make an SSL certificate?
If you don’t have an SSL certificate, you won’t be able to set up an FTPS server. To establish a secure connection between the client and the FTP server, your FTP server needs an SSL certificate. This SSL certificate includes details about the server’s identification as well as the encryption method that was utilized when establishing the secure connection. End users can more easily authenticate the authenticity of a distant machine by using certificates.
Depending on the specifics of your situation, you can create one of three different types of certificates:
- Certificates that have been signed by a CA These are the kinds of certificates that are used in production servers and when users reach the server from outside the network (NAT and firewall) through the Internet. Certificates signed by a Certificate Authority assure FTP clients that the server they are connecting to is who it claims to be.
- Domain Certificate These are certificates that are only used within an organization (among different domains) and are signed by the organization’s certificate authority. Users who are already part of the domain will not see any kind of warning notice, but users who are not part of the domain will.
- Self-signed Internal websites may make use of self-signed certificates; however, the client will consistently be presented with a warning about the usage of such certificates. Creating your identification is analogous to self-signing a certificate. You are aware that the ID is genuine, but other people will not be able to demonstrate that it belongs to you unless an authorized party produced it.
IIS support for the generation of SSL certificates
You can generate a self-signed certificate and a domain certificate with IIS; however, if you want to enable FTPS connections from users located outside of your organization, you will need a certificate signed by a CA.
- Launch IIS Manager by selecting it from the list of available Administrative Tools. In addition, you can launch IIS Manager by entering “inetmgr” into the “Run” utility on your computer.
- Select your connection (or server) in the IIS manager, and then navigate to the “Server Certificates” menu option.
- Make your self-signed certificate by selecting the “Create Self-Signed Certificate” option from the Actions menu on the right-hand side of the IIS Manager.
- Give it a name that people will recognize, and then click the Ok button.
- Keep in mind that even though your self-signed certificate ought to be completely risk-free to use, none of the web browsers or FTP clients are aware of its existence; hence, your FTP clients will issue a warning about it.
Developing a certificate for a domain
If you are intending to utilize the FTPS server that is part of your domain, you need to need a domain certificate.
- Navigate to the Server Certificates menu, and then click the “Create Domain Certificate” button.
- When enrolling and creating a Certificate Signing Request, you will need to provide information regarding your Distinguished Name (DN) (CSR).
- Utilize the Fully Qualified Domain Name (FQDN) of the machine or web server in the “Common name” box.
- Use the official firm’s name when filling out the Organization section.
- Please use the department or area while filling out the Organization Unit (OU) (optionally for Active Directory domains).
- Indicate the Online CA that operates within your domain. You should have the “choose” option available to you if there is an Online Certification Authority that may be found online. You can define the DA by using a suitable name, such as CertificateAuthorityNameNameServerName if the “Select” option is not accessible.
- Make use of SSL/TLS Certificate management solutions provided by a third party.
You can generate certificates for your organization using the IIS, or you can make use of third-party solutions instead. By way of illustration, making use of a multi-protocol file server such as SolarWinds ServU MFT enables you to generate self-signed certificates as well as certificate requests (CSR).
How to make a brand-new FTP user using Microsoft Windows?
Make a new user that has the appropriate rights so that you can connect to the FTPS server.
- Activate Users and Groups for the Local Area. Proceed to Computer Management by going to Server Manager > Tools.
- To manage local users and groups, expand the Systems tools > menu and select “Local Users and Groups.” You also have the option of using Win+R to enter “Run” and then typing “lusrmgr.msc” in the box that appears.
- Navigate to the Action menu, and then select “New User”.
- Enter the user’s credential information into the “New User” window that’s currently open.
- Select “Create” from the menu.
Now, let’s make sure the newly-created user has access to the root folder of the FTP server.
“inetpub” is the name of the folder that is used by default in IIS for storing content. Find the folder titled “ftproot” by navigating to the C:inetpub directory. Open the “Properties” menu by right-clicking on it. Click on the “Edit” button after you have navigated to the “Security” tab.
Navigate to the user account that you created in the past and modify the permissions. You can restrict or enable the user’s access to the resources within the FTP Root folder, for instance. We have established a user, but to access our content folder on the FTP server, we will also require access.
Add details for Authentication as well as Authorization
You will have the opportunity to specify which users are connecting to your FTPS server and how they are doing so on the following screen. Depending on the type of SSL certificate, you have the option of selecting between Anonymous (with encryption enabled) or Basic (with no encryption).
You will be able to view an FTP user that you have already created with IIS if you have done so (as was demonstrated in the previous section). However, if you want to grant access to the FTP server to all of the users on the domain, select “All Users.” If you don’t want to do so, specify the users in the textbox.
Additionally, from this box, you can grant the FTP server user read, write, or read/write permissions. Once your FTP site has been created, you will be able to locate it in the “Sites” section of the IIS Manager. To begin, verify that the status is currently “started”.
Set up authentication and authorization for the FTP server
- Navigate to your newly created FTP site and click the “FTP Authentication” button.
- When you go to the following window, make sure that “Basic Authentication” is turned on and “Anonymous Authentication” is turned off. Once more, this is dependent on the certificate you possess.
- At this point, return to the menu for the FTP feature, and then click FTP Authorization Rules. Keep in mind that if you had set an Authorization Rule while you were in the process of initially building the FTP site, you won’t need to do this step.
- When the following window appears, select “Add Allow Rule” from the menu. When you get to this screen, click “All users” (unless you want to identify users), and then provide the appropriate permissions.
- Navigate back to the menu of features for the FTP site, and then select “IIS Manager Permissions.” If you do not see this feature, you will need to go back to Server Manager > Server Roles > Web Server (IIS) > Management Tools > and check to see if all of the Management tools are selected. If you do not see this feature, you will need to go back to Server Manager > Server Roles > Management Tools >.
- Select “Allow User” with the mouse. To gain access to the FTP site, you will need to choose the appropriate user in the following dialog. Since we just created a user in Windows, you can now proceed to select the “Select” button. After that, locate the object name, which should be the user, and then click the “Ok” button.
File.com – Secure File Access Made Easy
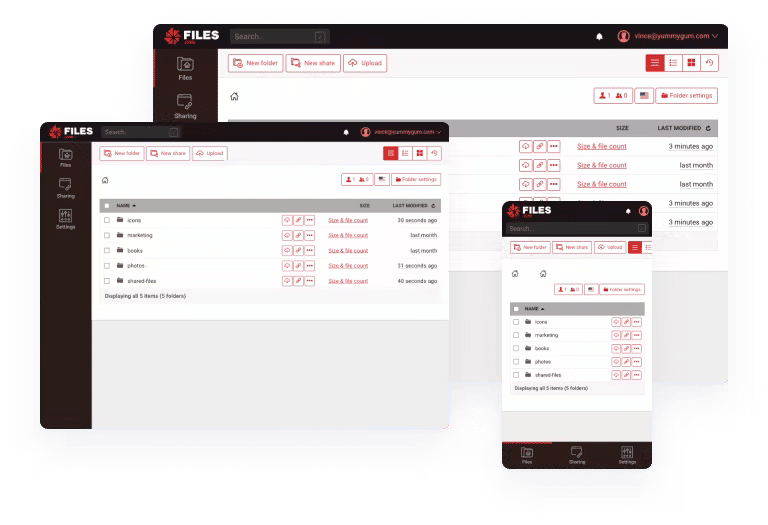
Files.com is a software as a service (SaaS) MFT file transfer platform that enables businesses to safely transfer or share files with users, teams, and other businesses (B2B). Files.com is a one-of-a-kind solution that combines the fundamental advantages of file transfer protocol (FTP) software with the advantages of managed file transfer (MFT) software in terms of security and automation.
How to install FTP in Windows Server
- In Windows Server Manager, navigate to the Roles node and click the Add Roles button located in the Roles Summary panel.
- Within the Add Roles wizard, select:
- Navigate to the Server Roles step and ensure that the Web Server (IIS) role is selected.
- Continue to the Role Services stage and ensure that the FTP Server > FTP Service role service is checked. If you do not require the Web Server role service, deselect the checkbox that enables it. The Management Service > IIS Management Console role service must be activated.
- Once you have reached the final step of the procedure, click the Install button.
- Wait until the installation is finished before continuing.
If you already have IIS installed (i.e., as a Web Server), then you should do the following:
- In Windows Server Manager, navigate to the Roles node, and then click the Add Role Services button on the panel labeled Web Server (IIS) > Role Services.
- Using the Add Role Services wizard, you should:
- Ensure that the FTP Server > FTP Service role service is running.
- Check the box next to Management Service > IIS Management Console and make sure it’s selected.
- Click the Next button to confirm.
- Once you have reached the final step of the procedure, click the Install button.
Installing SFTP server on Windows using IIS FAQs
What is a secure FTP server?
A secure FTP server is a server that uses secure protocols, such as SFTP or FTPS, to transfer files over a network, ensuring that data is encrypted and protected from unauthorized access.
What is IIS?
Internet Information Services (IIS) is a web server software package created by Microsoft for use with Windows operating systems.
Can IIS be used to create an FTP server?
Yes, IIS can be used to create an FTP server on a Windows operating system.
What are the steps to install an FTP server using IIS?
To install an FTP server using IIS, you need to install the FTP server feature in IIS, configure FTP authentication settings, and create FTP sites and users.
What are some common FTP server software packages?
Common FTP server software packages include FileZilla Server, vsftpd, Pure-FTPd, and ProFTPD.
What are some best practices for securing an FTP server?
Best practices for securing an FTP server include regularly patching software, using strong passwords and access controls, encrypting data in transit, auditing and monitoring server activity, and conducting regular security assessments and audits.