SFTP is an example of a communication protocol that is frequently utilized to transfer files between various types of business environments (SSH File Transfer Protocol or Secure File Transfer Protocol). To this day, Microsoft Azure does not offer a fully managed platform solution that supports the SFTP protocol and enables users to share files with other users.
The activation of a virtual machine in Azure that hosts the SFTP service incurs costs associated with the activation of the virtual machine as well as a substantial amount of administrative effort. This article will offer you a method that you can use to supply the SFTP service to Azure in an Azure environment by making use of Azure Container Instances (ACI) and Azure File Shares.
Mounting your container or syncing your data to and from Azure blob storage are both options that are available to you when using Microsoft Azure. The Secure File Transfer Protocol (SFTP) is a very common system that many companies use nowadays to share files either within their own company or between companies.
It is expensive and time-consuming to create an SFTP that is built on a VM. While data is stored in Azure Files, which is a fully managed SMB service in the cloud, the ACI service is relatively low in cost and requires very little maintenance.
Steps to Deploy a Secure FTP Service on Microsoft Azure
Azure Container Instances (ACI), Containers may be run on-demand in Azure’s managed serverless environments using this method, which is both the easiest and quickest way to do so. All of this is attainable without the requirement of activating certain virtual machines, and the amount of maintenance that is required is essentially nonexistent. Azure Container Instances is a solution that may be used in situations that call for the use of isolated containers, and this can be done without the necessity of adopting an orchestration system. The price of the Azure Container Instances service is determined by the total number of virtual CPUs and RAM gigabytes that are utilized by the container group.
If you use ACI instead of virtual machines (VMs), you won’t have to worry about providing the underlying infrastructure. In addition, you don’t need to make use of high-level services to manage containers.
Instead, ACI will provide you with the fundamentals necessary to manage a collection of containers and will support container orchestrators such as Kubernetes. Windows, macOS, and Linux deployments that are hosted in the cloud or on-premises are all capable of mounting Azure Files shares simultaneously.
It makes it possible for programs that are running in your virtual machines to share files using the standard Windows APIs or the Azure Files REST API. Furthermore, Azure File Sync enables the caching and synchronization of Azure Files shares on Windows Servers so that they may be accessed locally. Apart from that, here are some steps to deploy a secure FTP service on Microsoft Azure:
Install SFTP on Both ACI and File Share
To assist you in setting up an on-demand SFTP server with ACI, the community supporting Microsoft Azure has made available two specialized Azure Resource Manager templates (ARM templates). JSON serves as the foundation for these templates. They provide you with the appropriate resources that you require to set up an SFTP solution.
Both active and passive modes of connection are supported when using Azure App Service. Because your deployment computers are typically hidden behind a firewall, you should use passive mode whenever possible (in the operating system or as part of a home or business network).
When the container is deleted, these ARM templates will have already created a storage account and File Share, which will be mounted within the ACI to provide persistent storage. The ACI is offered in these particular geographies, and the Docker Hub serves as the repository for the container images that are required by the templates.
Ensure You Have a Storage Account by Using Microsoft Azure
Your data in Azure Storage will have its distinct namespace with a Microsoft Azure storage account, and this namespace will be accessible through HTTP or HTTPS from anywhere in the world.
- First, log in to the Microsoft Azure portal by going to Open Azure and following the instructions there. The JASON templates will guide you through the various forms.
- Pick one of the different types of storage accounts that are offered.
- The template includes three basic General-purpose v1 blob storage account services. These are included in the template. Standard LRS, _ZRS, and _GRS are all different types of storage redundancy choices. LRS (Locally Redundant Storage), ZRD (Zone Redundant Storage), and GRS (Global Redundant Storage) are all types of redundant storage (GRS).
- You can give the connection whatever name you choose, then provide the name of an Azure container, your Azure storage account name, and your Azure access key, and then click the Save button.
- After that, you will need to initiate the creation of a folder on Files.com and then mount blob storage from Azure into that folder. To access your files, navigate to the Files section of the Files.com dashboard.
Utilizing and Doing Tests with the SFTP Service:
To configure an SFTP client, you will need to obtain the fully qualified domain name (FQDN) of the container group known as sftp-group (FQDN). Because ACI’s container groups do not allow static IPs, we utilize the fully qualified domain name (FQDN) of the ACI container group instead of a public IP.
- Navigate to your “Container Instances” menu to obtain the FQDN for your container instances group called “SFTP group”.
- You can use an SFTP client like FileZilla to connect remotely to the Azure SFTP server. FileZilla is one example of an SFTP client. Start by launching FileZilla and entering the SFTP server’s information into it.
You will obtain the SSH public key when you initially create a connection with your SFTP server. Your SFTP client will alert you to the “unknown host key” because it is unaware of this particular key.
This message will be sent to you by your client. Click the “Ok” button given that you are aware that this is your new SFTP server.
You will discover that the SFTP client provides you with access to a folder referred to as “upload”. If you use SFTP to move files to this “upload” folder, the files will be uploaded to the Azure File Share after the transfer is complete. You can use this as a test by uploading a file into the folder labeled “upload”.
To configure an SFTP client, you will need to obtain the fully qualified domain name (FQDN) of the container group known as sftp-group (FQDN). Because ACI’s container groups do not allow static IPs, we utilize the fully qualified domain name (FQDN) of the ACI container group instead of a public IP.
Navigate to your “Container Instances” menu to obtain the FQDN for your container instances group called “SFTP group”.
- Select the sftp-group by clicking on it.
- On the next screen, locate the FQDN that is relevant, and copy it.
Establish a Connection with the Client
You can use an SFTP client like FileZilla to connect remotely to the Azure SFTP server. FileZilla is one example of an SFTP client. Start by launching FileZilla and entering the SFTP server’s information into it.
You will obtain the SSH public key when you initially create a connection with your SFTP server. Your SFTP client will alert you to the “unknown host key” because it is unaware of this particular key. This message will be sent to you by your client. Click the “Ok” button given that you are aware that this is your new SFTP server.
You will discover that the SFTP client provides you with access to a folder referred to as “upload”. If you use SFTP to move files to this “upload” folder, the files will be uploaded to the Azure File Share after the transfer is complete. You can use this as a test by uploading a file into the folder labeled “upload”. Through the Azure File Share, the files will always be available to be accessed.
Make Sure to Check the SFTP Server
- You should now navigate your browser to the Azure Portal > Storage Accounts. Launch the storage that was made specifically for the resource group (SFTP-Group).
- Navigate to the File Shares section of Data Storage, and then launch your SFTP File Share.
- You will be able to view any files that you have uploaded from this location.
Utilizing a Cloud-Based File Sharing Service Provided by a Third-Party
You are likely investigating Microsoft Azure because of the powerful Blob Storage solution it offers. When you save your files in Azure, you can be assured that not only are they accessible from any location and at any time, but that they are also safe. However, as was said earlier,
Azure does not provide an SFTP as a service option, nor does it provide an SFTP managed service option. Therefore, you have the option of either continuing to use the solution from before, which will come with certain drawbacks or integrating a service provided by a third party.
What Steps Should I Take to Debug my FTP Deployment?
The first thing you need to do when debugging an FTP deployment is to distinguish between a deployment problem and a runtime application problem.
When there is a problem with the deployment, your application will normally receive either no files or incorrect files. You can diagnose the problem by looking at your FTP deployment or choosing another deployment path (such as source control).
A runtime application problem often manifests itself as the correct set of files being deployed to your app but the app behaves unexpectedly. You can perform troubleshooting by concentrating on the behavior of the code while it is being executed and by investigating particular failure paths.
What Exactly is Files.com, and Why Should One Utilize It?
Files.com is a service for sharing files that is intelligent, hosted in the cloud, and safe. Files.com is not only a powerful cloud storage service, but it is also a file-sharing service that enables collaboration, automates file-sharing operations, and provides security for those processes. Through the use of shared links, inbound inboxes, and workflows, you can collaborate on file-sharing with this service.
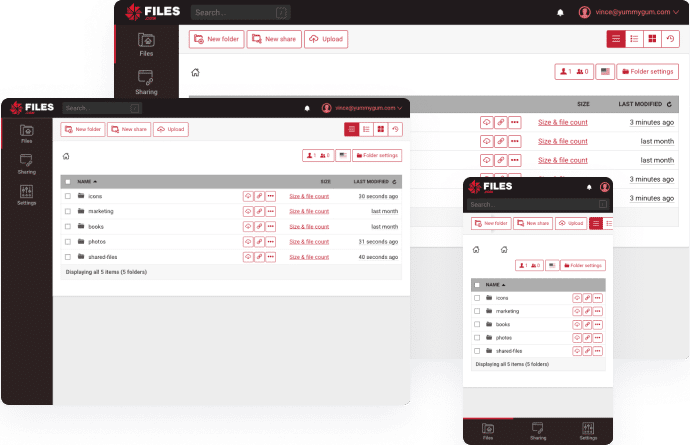
One of the distinguishing characteristics of Files.com is its capacity to combine a variety of service providers. Files.com allows you to mount or sync many prominent public cloud storage providers, including Azure and supports file transfer techniques such as FTP, SFTP, and WebDAV. Additionally, Files.com allows you to transfer files using any of these mechanisms.
Why Use files.com When You Could Use SFTP Instead?
There is an integration between Files.com and Microsoft Azure Blob Storage. It is possible to mount Azure’s blob storage directly into the SFTP service provided by Files.com, eliminating the need for any additional containers or virtual machines.
You can, however, mount an existing container within Files.com if it becomes necessary. In addition, you have the option to synchronize a folder or folders from Files.com with Azure’s Blob Storage in either a one-way or two-way fashion.
The Files.com Enterprise Connectivity Addon is required to complete the Azure integration. If you have a Premier or Enterprise subscription, you can get this add-on for free. You can register for the 7-day free trial.
Conclusion
In this post, we have to demonstrate how to establish a Secure File Transfer Protocol (SFTP) on Microsoft Azure using two different methods: To begin, you can circumvent the requirement to spin up any VMs by taking advantage of Azure’s ACI and File Share services. Second, we made use of Microsoft’s ARM templates that were made available to us.
The second approach that we utilized consisted of using Azure’s container blob storage in conjunction with a third-party service called Files.com to handle SFTP. Additionally, we incorporated the Azure server into Files.com and then mounted Azure as a folder on the Files.com platform.
Deploy SFTP Service on Microsoft Azure FAQs
What services are required to deploy a secure SFTP service on Microsoft Azure?
To deploy a secure SFTP service on Microsoft Azure, you will need to use several Azure services, including Azure Virtual Machines, Azure Storage, and Azure Network Security Groups.
What are the steps to deploy a secure SFTP service on Microsoft Azure?
The steps to deploy a secure SFTP service on Microsoft Azure include creating an Azure Virtual Machine, configuring an SFTP server on the VM, creating an Azure Storage account, and configuring Azure Network Security Groups to restrict access to the SFTP service.
Can I use a third-party SFTP server instead of configuring one on an Azure Virtual Machine?
Yes, you can use a third-party SFTP server instead of configuring one on an Azure Virtual Machine. However, you will still need to configure Azure Storage and Network Security Groups to ensure the security of the service.
Are there any limitations to deploying a secure SFTP service on Microsoft Azure?
The performance of the SFTP service may be impacted by factors such as network latency and the size of files being transferred. Additionally, it is important to monitor the service regularly to ensure that it is functioning correctly and to identify any potential security issues.
Is it possible to use Azure Active Directory to authenticate users for the SFTP service?
Yes, it is possible to use Azure Active Directory (Azure AD) to authenticate users for the SFTP service. This can provide additional security benefits, such as multi-factor authentication and conditional access policies.